Building a Highly-Available Kubernetes Cluster on a Mini PC
There is no cloud, it's just someone else's computer.
Managed Kubernetes services (EKS, GKE, AKS) quickly become expensive for continuous learning and experimentation. Meanwhile, lightweight solutions like minikube or k3s have limited features and may not be suitable for production-like testing. This gap led me to build a proper HA Kubernetes cluster on affordable homelab hardware using Proxmox Virtual Environment.
In this blog post, I'll demonstrate how to deploy a highly-available Kubernetes cluster with 3 control plane nodes and 3 worker nodes - all on a single mini PC.
Why Proxmox?
Proxmox Virtual Environment (PVE) is the secret sauce that makes this possible:
- Easy Scalability - Simply clone Virtual Machines to create more nodes
- Resource Flexibility - Dynamically resize CPU/RAM for different compute need
- Snapshot Nirvana - Roll back botched configs in secondds
- Network Isolation - Create safe sandboxes with Linux bridge / OVS bridge
- HA Simulation - Shutdown VMs on-demand to test failure scenarios

"But isn't running everything on one host a Single Point of Failure (SPOF)?" Absolutely. This is about learning HA patterns cost-effectively. For true resilience, spread VMs across physical nodes.
Hardware: Beelink SER 8
| Component | Specifications |
|---|---|
| CPU | AMD Ryzen 7 8845HS (8C/16T) |
| RAM | 32GB DDR5 (2×16GB) |
| Storage | 2TB NVMe SSD |
| Hypervisor | Proxmox VE 8.4.0 |

Cluster Architecture
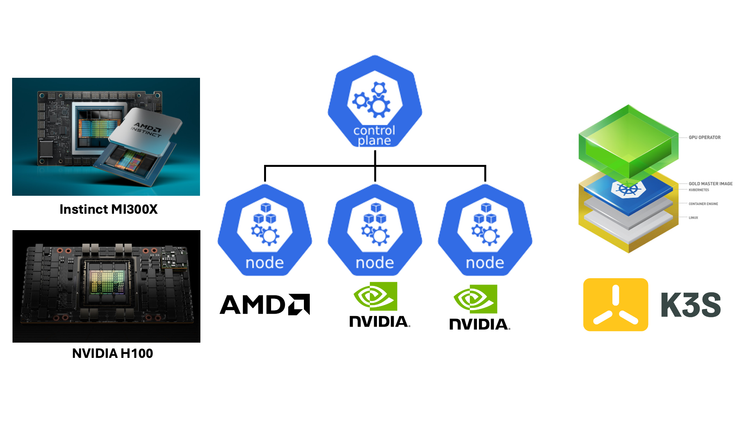
A stacked HA cluster is deployed here, meaning that etcd is stacked on top of the cluster formed by the nodes managed by kubeadm that run control plane components. In other words, etcd is running as pods on the control planes instead of externally hosted.
| Role | Count | vCPU | Mem(GB) | Disk(GB) | OS |
|---|---|---|---|---|---|
| Gateway&LB | 1 | 1 | 0.5 | 48 | Rocky 9.6 |
| Control Plane | 3 | 2 | 2 | 48 | Rocky 9.6 |
| Worker | 2 | 2 | 4 | 48 | Rocky 9.6 |
| Large-Mem Worker | 1 | 2 | 8 | 48 | Rocky 9.6 |

Network Configurations
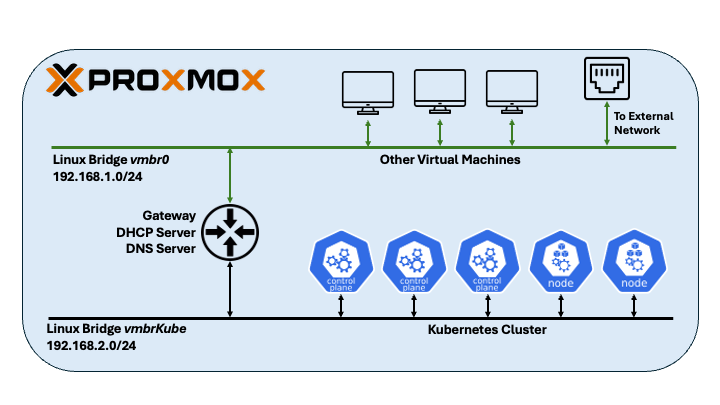
When setting up a Kubernetes cluster in Proxmox VE (PVE), network design is critical for both functionality and manageability.
PVE typically auto-configures vmbr0 - a Linux bridge bonded to your physical NIC - allowing all connected VMs direct external access. While simple, this approach lacks isolation, exposing cluster traffic to your broader network.
For a cleaner architecture, a dedicated internal bridge (e.g., vmbrKube) is created without physical uplinks. Kubernetes nodes connect exclusively to this isolated network and operate in a separate, private IP address range (e.g., 192.168.2.0/24). An additional gateway VM bridges vmbrKube and vmbr0, routing traffic while providing DHCP/DNS via dnsmasq and firewall rules via iptables. This physically separates cluster traffic while enabling controlled external access.
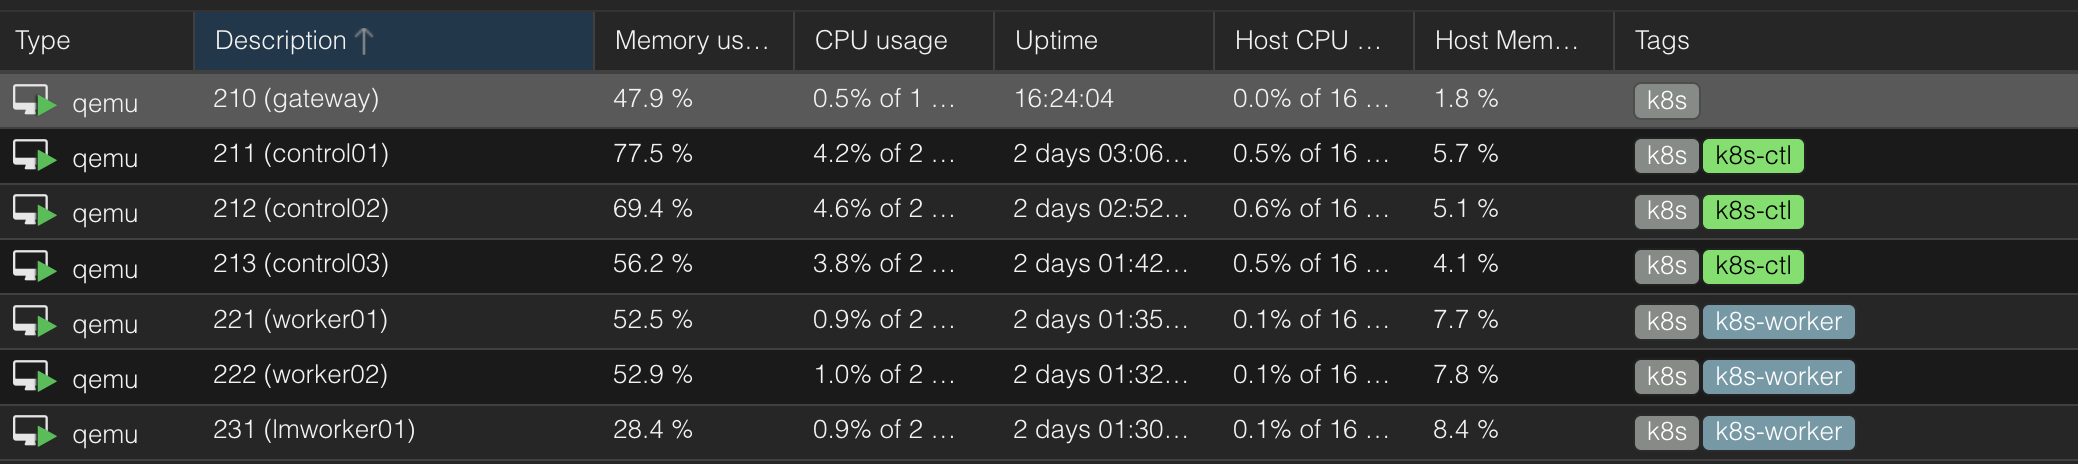
192.168.2.10 gateway kube.home.arpa

192.168.2.11 control01
192.168.2.12 control02
192.168.2.13 control03

192.168.2.21 worker01
192.168.2.22 worker02

192.168.2.31 lmworker01
/etc/hosts
OS Installation & Configurations
Create a VM with a Rocky Linux 9.6 ISO image attached to it, install OS using Minimal Install without desktop environment.
dnf update
dnf config-manager --enable crb
dnf install epel-release
crb enable
dnf update

dnf install vim tmux curl pdsh pdsh-rcmd-ssh
Update packages and install utilities
# set SELINUX=disabled
vi /etc/selinux/config
reboot

sestatus
getenforce

systemctl disable --now firewalld
systemctl status firewalld
Disable SELinux and Firewalld
# disable swap
swapoff -a
sed -i '/ swap / s/^\(.*\)$/#\1/g' /etc/fstab
Disable swap
modprobe br_netfilter
echo "br_netfilter" >> /etc/modules-load.d/k8s.conf


tee /etc/sysctl.d/kubernetes.conf <<EOF
net.bridge.bridge-nf-call-ip6tables = 1
net.bridge.bridge-nf-call-iptables = 1
net.ipv4.ip_forward = 1
EOF

sysctl --system
Enable forwarding
Load Balancer
Clone the VM and install HAProxy.
dnf install haproxyAdd configuration for Kubernetes API server.
frontend k8s-frontend
    bind *:6443
    mode tcp
    option tcplog
    default_backend k8s-backend

backend k8s-backend
    mode tcp
    option tcp-check
    balance roundrobin
    server server-1 control01:6443 check fall 3 rise 2
    server server-2 control02:6443 check fall 3 rise 2
    server server-3 control03:6443 check fall 3 rise 2
/etc/haproxy/haproxy.cfg
Container Runtime & K8S Components
Install and enable containerd.
dnf -y install dnf-plugins-core
dnf config-manager --add-repo https://download.docker.com/linux/rhel/docker-ce.repo
dnf install -y containerd.io

systemctl restart containerd
systemctl enable --now containerd
systemctl status containerd
It is important to configure container runtime and kubelet to use the same version of cgroup. Since Rocky 9.6 is using cgroup v2, it is recommended to use systemd as driver.
containerd config default | tee /etc/containerd/config.toml >/dev/null
sed -i 's/SystemdCgroup = false/SystemdCgroup = true/g' /etc/containerd/config.toml
sed -i 's/registry.k8s.io\/pause:3.8/registry.k8s.io\/pause:3.10/' /etc/containerd/config.toml
Configure containerd
More on configure cgroup drivers.
Install kubectl, kubeadm, kubelet, and enable kubelet.
cat <<EOF | sudo tee /etc/yum.repos.d/kubernetes.repo
[kubernetes]
name=Kubernetes
baseurl=https://pkgs.k8s.io/core:/stable:/v1.33/rpm/
enabled=1
gpgcheck=1
gpgkey=https://pkgs.k8s.io/core:/stable:/v1.33/rpm/repodata/repomd.xml.key
exclude=kubelet kubeadm kubectl cri-tools kubernetes-cni
EOF

sudo yum install -y kubelet kubeadm kubectl --disableexcludes=kubernetes
sudo systemctl enable --now kubelet
Bootstrap First Control Plane
Clone the base VM to create the first control plane node. Use kubeadm init to initialize the cluster. Some notable configurations:
control-plane-endpoint- the load balancer DNS name with API server portapiserver-cert-extra-sans- URLs later used to access the API serverpod-network-cidr- IP address range for Pod networkservice-cidr- IP address range for Servicesupload-certs- temporary upload the control plane certificates to a Secret in the cluster
kubeadm init \
  --control-plane-endpoint "kube.home.arpa:6443" \
  --apiserver-cert-extra-sans "kube.home.arpa,192.168.2.10" \
  --pod-network-cidr "10.234.0.0/16" \
  --service-cidr="10.96.0.0/12" \
  --upload-certs
To find other flags, use kubeadm init --help.
Upon successful initialization of the cluster, the output will be similar to:
Your Kubernetes control-plane has initialized successfully!

To start using your cluster, you need to run the following as a regular user:

  mkdir -p $HOME/.kube
  sudo cp -i /etc/kubernetes/admin.conf $HOME/.kube/config
  sudo chown $(id -u):$(id -g) $HOME/.kube/config

Alternatively, if you are the root user, you can run:

  export KUBECONFIG=/etc/kubernetes/admin.conf

You should now deploy a pod network to the cluster.
Run "kubectl apply -f [podnetwork].yaml" with one of the options listed at:
  https://kubernetes.io/docs/concepts/cluster-administration/addons/

You can now join any number of control-plane nodes running the following command on each as root:

  kubeadm join kube.home.arpa:6443 --token xplcr3.gyq8n02hji4z43x3 \
        --discovery-token-ca-cert-hash sha256:c4b385089e6af4f678e135c6ee72ea594cc855eede4165fb3c5c50597be7d88b \
        --control-plane --certificate-key b4702abd943a28ef7f0285453ce7edf4f4bec1283f9adb9301ee872c418cd386

Please note that the certificate-key gives access to cluster sensitive data, keep it secret!
As a safeguard, uploaded-certs will be deleted in two hours; If necessary, you can use
"kubeadm init phase upload-certs --upload-certs" to reload certs afterward.

Then you can join any number of worker nodes by running the following on each as root:

kubeadm join kube.home.arpa:6443 --token xplcr3.gyq8n02hji4z43x3 \
        --discovery-token-ca-cert-hash sha256:c4b385089e6af4f678e135c6ee72ea594cc855eede4165fb3c5c50597be7d88b
CNI Networking (Flannel)
At this stage, when you kubectl get nodes, the control plane node will be shown as "Not Ready", this is because a CNI network policy need to be deployed. There are a few options for CNI and here Flannel is used.
curl -O -L https://github.com/flannel-io/flannel/releases/latest/download/kube-flannel.yml

# change CIDR
vim kube-flannel.yml

kubectl apply -f ./kube-flannel.yml
Deploy Flannel
It is important to make sure the CIDR used in Flannel manifest (default to 10.244.0.0/16 ) is the same as the pod-network-cidrs used in kubeadm init.
Wait until Flannel deployment is "Ready" and the control plane is "Ready"
Join Control Planes & Workers
Clone the VM to create more control planes and workers, adjust hardware resources if necessary.
Use the command from kubeadm init output to join new control planes.
# join control planes
kubeadm join kube.home.arpa:6443 --token xplcr3.gyq8n02hji4z43x3 \
        --discovery-token-ca-cert-hash sha256:c4b385089e6af4f678e135c6ee72ea594cc855eede4165fb3c5c50597be7d88b \
        --control-plane --certificate-key b4702abd943a28ef7f0285453ce7edf4f4bec1283f9adb9301ee872c418cd386

# join workers
kubeadm join kube.home.arpa:6443 --token xplcr3.gyq8n02hji4z43x3 \
        --discovery-token-ca-cert-hash sha256:c4b385089e6af4f678e135c6ee72ea594cc855eede4165fb3c5c50597be7d88b
The Kubernetes cluster is ready now.
NAME         STATUS     ROLES           AGE    VERSION
control01    Ready      control-plane   45m    v1.33.3
control02    Ready      control-plane   15m   v1.33.3
control03    Ready      control-plane   14m   v1.33.3
lmworker01   Ready      <none>          11m   v1.33.3
worker01     Ready      <none>          12m   v1.33.3
worker02     Ready      <none>          12m   v1.33.3
kubectl get nodes
Sweat & Debugging
ETCD Ghostly Receive SIGTERM
When I started the cluster, all Kubernetes components are frequently crashed and restarted, one by one. There's no obvious error message from log but ETCD pod receive SIGTERM.
The underlying problem was containerd cgroup driver and kubelet cgroup driver not matching, and cgroup killed ETCD pod. When ETCD is killed, kube API server, schedulers subsequently fail.
I tried to simply add SystemdCgroup = false to the configuration file but didn't work. The final solution was to re-generate default containerd configuration using containerd config default then modify.
Flannel Not Ready
Mistake 1: Deploy network policy AFTER joining more nodes.
Mistake 2: Forget to load br_netfilter kernel module or enable forwarding.
Mistake 3: Didn't specify pod network CIDR during kubeadm init or kubeadm init CIDR and Flannel manifest CIDR not matching.
CRICTL
When kube API server is down and kubectl is not available, crictl is useful for checking pods and inspect logs.
crictl ps -a

crictl logs

crictl pods
PDSH
PDSH is helpful for execute commands in parallel across the cluster.
export PDSH_SSH_ARGS="-q -o StrictHostKeyChecking=no -o UserKnownHostsFile=/dev/null"

alias shctl="pdsh -R ssh -w control[01-03]"
alias shwrk="pdsh -R ssh -w worker[01-02]"
alias shall="pdsh -R ssh -w control[01-03],worker[01-02]"
Final Thoughts
This cluster has become my personal Kubernetes dojo. Was it easy? Absolutely not. Wrestling with cgroup drivers, untangling network policies, and resuscitating crashed control planes tested my patience. But that struggle is precisely where the magic lives.
Every troubleshooting session peeled back another layer of the "someone else's computer" illusion. I now feel what happens when etcd quorum breaks. I see how HAProxy stitches together a virtual control plane. I understand why cloud bills are justified—and when they're not. And this, is the joy of self-hosting
More Kubernetes posts on my Kubernetes index page.